Dataset
First Dataset - Water Segmentation
The datasets used in the project were chosen to test the model initially with water and water-related datasets. At this stage, dataset searches were mostly conducted through various data-related sites such as Kaggle, Roboflow, and GitHub. The primary goal and search criterion were for the dataset to include segmentation images or numerical segmentation data.
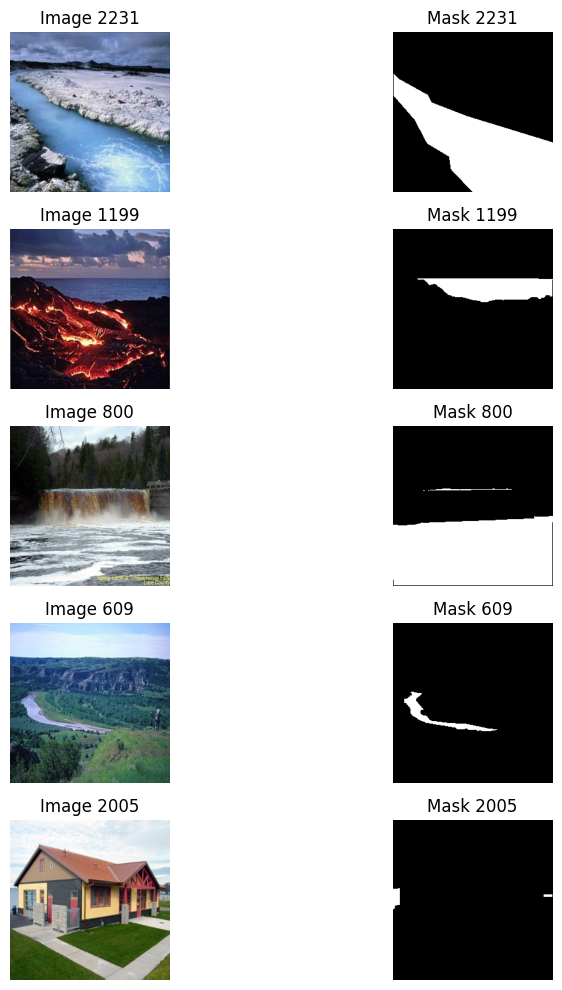
The first dataset used is the Water Segmentation Dataset found on Kaggle and previously used in the WaterNet article. This dataset’s folder named waterv1 is used for both training and testing purposes. The dataset consists of two parts: images and their segmentations. The images are in RGB and .jpg format. No augmentation was applied to the dataset; it was used directly. The only modification made was resizing the images to suitable dimensions for the model.
Second Dataset - Pothole Image Segmentation
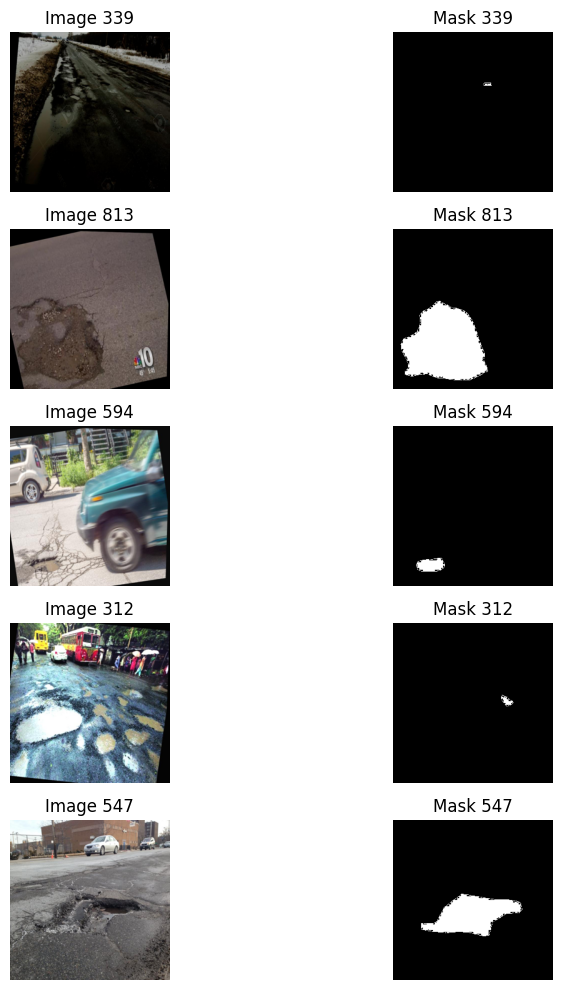
The second dataset used is related to water as well, named Pothole Image Segmentation Dataset. This dataset, like the previous one, was obtained from Kaggle. It contains 780 images, with 720 for training and 60 for validation. Unlike the previous dataset where segmentation data were in .png format, this dataset is in .txt format as it is intended for YOLO. To convert it to a format suitable for our model, I used the following code, which I obtained from this link.
image_path=""
annotation_path=""
# The Helper functions below assume that the image size is (640,640).Hence resizing the image.
#Open the image
img = Image.open(image_path)
#Resize the image to 640 by 640
img = img.resize((640, 640))
#if you want then you can save the resized image by img.save('resized_image.jpg')
def maskVisualize(image,mask):
    fontsize = 18
    f, ax = plt.subplots(2, 1, figsize=(8, 8))
    ax[0].imshow(image)
    ax[1].imshow(mask)
#convert the mask from the txt file(annotation_path is path of txt file) to array of points making that mask.

def generate_points(annotation_path=''):
    labels=[] # this will store labels
    #we are assuming that the image is of dimension (640,640). then you have annotated it.
    with open(annotation_path, "r") as file:
        points=[]
        for line in file:
            label,lis=line.split()[0],line.split()[1:]
            labels.append(label)
            lis=list(map(float,lis))
        for i in range(len(lis)):
            lis[i]=int(lis[i]*640)
        newlis=[]
        i=0
        while(i<len(lis)):
          #appendint the coordinates as a tuple (x,y)
            newlis.append((lis[i],lis[i+1]))
            i+=2
        points.append(newlis)
        return labels,points
#the below function convert the boundary coordinates to mask array (it shows mask if you pass 1 at show)
#the mask array is required when we want to augument the mask also using albumentation
def convert_boundary_to_mask_array(labels,points, show=0):
    mask = Image.new("L", (640, 640), 0)
    draw = ImageDraw.Draw(mask)
    for i,boundary_coords in enumerate(points):
      #boundary_coords represent boundary of one polygon
        draw.polygon(boundary_coords,fill=1)
      #Compute the centroid of the polygon
        centroid_x = sum(x for x, _ in boundary_coords) / len(boundary_coords)
        centroid_y = sum(y for _, y in boundary_coords) / len(boundary_coords)
        centroid = (int(centroid_x), int(centroid_y))

        text = str(labels[i])
        font = ImageFont.load_default()
        text_w, text_h = draw.textsize(text, font=font)
        text_pos = (centroid[0] - text_w/2, centroid[1] - text_h/2)
        draw.text(text_pos, text, font=font, fill='black')
    mask_array = np.array(mask)*255
    if(show==1):
      #Image.fromarray(mask_array).show()
        cv2.imshow(mask_array)
    return mask_array
#function that takes mask path (yolov8 seg txt file) and return mask of an image (shape of mask == shape of image)
def generate_mask(annotation_path='',show=0):
    #pass show=1 for showing the generated mask
    #firstly we generate the points (coordinates) from the annotations
    labels,points=generate_points(annotation_path)
    #once we get the points we will now generate the mask image from these points (binary mask image (black/white))
    #mask is represented by white and ground is represented as black
    mask_array=convert_boundary_to_mask_array(labels,points,show)
    return mask_array
The code snippet added to automatically perform this conversion in the file is as follows:
def process_directory(image_dir, annotation_dir, output_dir):
    image_files = [f for f in os.listdir(image_dir) if f.endswith('.jpg')]
    for image_file in image_files:
        image_path = os.path.join(image_dir, image_file)
        annotation_file = os.path.splitext(image_file)[0] + '.txt'
        annotation_path = os.path.join(annotation_dir, annotation_file)

        output_file = os.path.splitext(image_file)[0] + '.jpg'
        output_path = os.path.join(output_dir, output_file)

        img = Image.open(image_path)
        img = img.resize((640, 640))
        mask_array = generate_mask(annotation_path=annotation_path, show=0)
        mask_image = Image.fromarray(mask_array)
        mask_image.save(output_path)

process_directory('/path/to/images', '/path/to/annotations', '/path/to/output')
Third Dataset
In addition to these datasets, as a third dataset, we are also trying a dataset related to trash floating on water. The link to this dataset is here. This dataset contains 2000 RGB images, with 1700 for training, 280 for validation, and 20 for testing. The difference of this dataset from others is the presence of bounding boxes instead of segmentations. Here, we will use the approach used in the second dataset to convert bounding boxes into rough segmentations for use. The main goal here, since it is to detect objects on the water, this dataset is also good for fine-tuning our model.